Friday, October 15, 2010

First all-grain - brew in a bag

First all-grain brew in a bag style:


That Sunday's brew session was... interesting :) I knew my drill would lose power half way through the grain bill. I didn't know that my fellow brewer/brother in law's backup drill chuck would be too small... or that my antique hand drill (getting desperate) wouldn't clamp on tight enough... or that my air tool set didn't have an actual drill. At least my father in law, Bill, doesn't live far and he had a super drill!

Drilling and filing the hole for the brewpot valve took longer than I thought as well... of course. At any rate, other than taking awhile, it worked fine - no leaks!

The brew in a bag experience was interesting. My mother-in-law, Terri, did a super job constructing the bag, but I think I had her get the wrong bag material. It didn't want to release any wort. We had to lift out 20 pounds of grain and probably 8 gallons of wort. We let it drain into a separate bucket, but it took a long time and we had to massage the bag a bit (probably extracting too much tannins, especially since it's a dark beer). But... we did end up with about the right amount of wort... and I think we got over 80% efficiency! It tasted good going into the fermenters too. We shall see. I wish it would have been ready by this week's brew club meeting... but it will have to wait for the next meeting, I guess.

Thanks again to Erich for his help and spare parts!


Northern California Homebrewer's Festival (NCHF) 2010

As a member of the Hetch Hetchy Hop Heads homebrew club, I made the trek out to Lake Francis Resort (a campground near Dobbins, CA - northeast of Sacramento, in the boonies). This year had over 20 clubs and over 208 club beers on tap for "the main event". Unfortunately, Sean Paxton, the homebrew chef, was busy at GABF this weekend - so the dinner Friday night was not as spectacular as in years past. Lake Francis did provide some very excellent prime rib, and with plenty of beer, it was a good evening. The Hoppy Hour before Friday's dinner was spectacular as well.

What amazes me the most about this awesome festival is the organization behind it. The Board sure has it figured out by now - everything appears to run like a well oiled machine, powered by homebrewers. It's all a volunteer effort that is incredible to behold. It reminds me of big projects at work - so many moving parts that when it's successful, all the players are working towards a common goal with the priority being the success of the project. Same here - all the clubs work really hard to present their food and beers in a generally well decorated booth. Everyone is very accommodating and friendly. It just makes for a great time and a successful event.

Since I didn't have any beer to bring at the time, my contribution was making pretzels...

Latest House Project - funky remodels

Buying a house that has been remodeled will give you some surprises. A house that has had a remodel on top of an older remodel may really give you a surprise... and most likely not in a good way. While our house's first remodel (from the '50's or '60's?) is weird, it's not terrible on its own. When the second more recent remodel came along with new landscaping, it made for a bad situation.

The warning signs were the dogs sniffing and being obsessed with weird spots around the house. No wonder they use beagles for drug sniffers or hunting dogs! Well, our Moose is a hunter. The project started with Moose catching a rodent. It was living in a gap under the siding, as we found out when we started to take things apart. Other interesting things were found as well - an oddly cantilevered wall, exposed ducting for the HVAC, a small amount of dry rot (did we catch this just in time?!), and more. Without totally rebuilding the wall, we flashed it better and are patching it all back so it doesn't house rodents and doesn't allow water intrusion.

Monday, September 27, 2010

Biking to work - striping ideas

Last Wednesday evening, instead of mountain biking after work, I attended a bike class. This class was put on by Commute.org and taught by John Ciccarelli. I knew John from work, so I was excited to hear him talk - he is a super bright guy.


One thing I took away from the class relates to bike lanes next to parallel parked cars. I have designed striping plans like this, I'll admit. Now that I have biked to work and a short stretch of road includes this striping layout, I don't know that I will implement this design anymore. Riding to work, I am always scared that I will get doored. I try to look at sideview mirrors and through windows to see if anyone is about to get out, but it's almost impossible to tell, especially at 15 mph. John calls this a form of russian roullette. With that analogy, I decided my next ride would not put me at this risk. The solution is to basically ride on the lane line, or along the left side of the bike lane - outside of the door zone.

The problem with this solution is that you're riding closer to the moving cars. I was actually more comfortable with this than I thought I would be - the differential speed is minimal, plus I was super stressed out playing my game of russian roulette. The only other issue is what are the drivers thinking - "hey, this guy's got a 5' bike lane, but he's riding at the very edge next to me... I'll get him and drive real close". I would agree. As a driver, I think things like that.

So, the real solution is to start implementing different striping - don't do the standard 5' bike lane next to an 8' parallel parking space. As I usually do, I had some good ideas in the shower. When I got into work, I did some googling and found these two examples that are pretty much what I was thinking. You have to delineate something that gives direction to the bike of where they should be riding (outside of the door zone), limit the amount of parking area, and give the drivers an expectation of where the bikes should be riding. I like the idea of a wider bike lane with the diagonal stripes in the door zone, myself.

The problem with these solutions, as shown, assume that you have 12', 13', or 18' to work with... and that it's a sufficient amount of space. I would go for the 7' parking lane, but think you would need another 7' (3.5' for door zone, and 3.5' for bikes) for a total of 14'. The trouble is, we're lucky to have 11' or 12' to work with, after narrowing the vehicle lanes. Where do you find the additional 2 or 3 feet?

Other alternatives include sharrows (I think these are too infrequent, hard to see, and too detailed), no striping just a wider lane (this doesn't give the driver an expectation of where the bikes should be, or tell the bikes where they should be), or a bike boulevard with a painted lane (too much maintenance).

Friday, September 24, 2010

Cheese Failure #2 and #3

I finally had a chance to check out the cheeses I made a few months ago. They never looked like they were aging well, so my hopes weren't too high. As I figured, they didn't taste very well. The blue might have been salvagable, but the brie certainly wasn't. Amazingly, the textures were spot-on, though. I guess I should be happy about that.

I didn't take any photos, because they were just too scary. I just dumped them as quickly as I could after cutting into them and taking a small taste of each... then washing my mouth with a bit of tequila to kill any scary stuff! I guess it worked, I'm not sick today. Whew.

I think the mistakes could be attributed to two things: 1. I didn't drain the cheeses long enough after they set, and 2. they got too hot about a week into the ripening stage.

This probably caused: 1. the blue to still be losing moisture after three months, and the molds to not grow properly, and 2. killing off the molds before they really had a chance, and to ripen too quickly too early.

If I am going to be successful with this cheese thing, I really do need better facilities, and better temperature control. Our house is just not set up well for making cheese (or beer, for that matter), and we don't have room for another fridge dedicated to cheese. Funny, our last house had both. Go figure.

Thursday, July 1, 2010

Solar Highway v3.1

Do you ever have your best thoughts during inoportune moments?  For me, it's always in the shower.  Maybe it's all the hot water that gets the brain cells going in the morning, thinking of fresh new things.  Of course, I often wonder if I could ever come up with a new idea - hasn't someone always thought of it before me?  I decided to jot this one down for posterity.

The solar highway.

Or maybe it should be the Solar Highway?  You see, there have been at least a couple different versions thought of before this one.  I did partly get the idea from them, I'm sure.  For reference, here are the ones I've seen:
http://www.oregon.gov/ODOT/HWY/OIPP/inn_solarhighway.shtml
http://solarhighway.org/
http://www.zdnet.com/blog/emergingtech/capturing-solar-energy-from-asphalt-pavements/1010

But here is my idea.  This may be only best applied to ultra urban areas, but then those are the locations that probably need the electricity the most.  Please excuse my poor photoshop skills:
Why not put panels on poles in the median?  There certainly isn't room in the right of way like in rural Oregon, so why not make use of the median and airspace above the vehicles?  I used a call box panel and pole as a template, but more significant structures could be used with many more panels.  I would think this could generate quite a bit of electricity.  It might also reduce the urban heat island effect.

I have heard ideas (in the Bay Area) of using the median and airspace above for a BART line, or high speed rail.  This isn't practical because of the interchanges - the rail line would have to go above the overcrossing.  With such flat slopes for rail, it would basically remain this height for the entire length of the median run - just not practical.  But the solar panels don't need to be continuous.  They could break at the interchanges, so there is nothing higher than the overpasses.

Would this be a minimal enough visual obstruction?  Maybe, maybe not... but it's a thought.  I don't know what business plan would work for this - does the State own them and sell the electricity to the power companies?  Would the power companies build it and lease an easement from the State?  Does it even make financial sense?  Considering all costs, could it be less expensive than coal or nuclear?  Maybe, maybe not.

First real ride of the season

After more than a few rides at Waterdog, I think we were all anxious to go on a "real" ride.  Waterdog is actually somewhat technical and is decent exercise, especially with the newer trails... but it gets old fast.  It's also a little crowded and feels a little urban.  Isn't mountain biking an excuse to get away from the hustle and bustle and out into the wilderness a bit?  We definitely got that at Purisima during this week's weekly ride.  Purisima is a nice ride, and with daylight savings, we can get the 2-hour ride in after work and before dark.  The challenge with Purisima is the 4-mile, 1,400-foot climb at the end.  At an average speed of 4mph, that's a 1-hour constant climb back to the top.  My knee is complaining today!  Hopefully my knee feels better in a day or two, ready for some great rides up in Reno this weekend.
Jason Y., Jason M., and Denise... ready for our 1-hour climb...


Jason M. and Savior appreciating the surroundings...

Second try at brie

After the disappointment of having to dump my first try at brie faded, I am trying a second time.  I also made another blue since the first one was successful.  Here are my three little brie's draining (made 5/24/10).

Tuesday, May 25, 2010

finished front/side and backyard bench

We finally (mostly) finished the front/side yard and, in the process, also finished the bench in the backyard.  Remaining to do in the front is to run drip lines, plant a tree, and put up some string for the hops.


In the course of working on the front yard, we had to take out some dirt.  There was a perfect place for it - in the storage bench.  They had a great idea, and put some thought into creating a storage bench, but it still just didn't work very well.  The smallest thing would clog the drain in the bottom (where does that drain go, anyway?!).  In the end, it was just a haven for spiders and mildew.  Now, it was a place to put the extra dirt from the front, and a place for the leftover stone from the wall/steps.  With an extra row of stone, we created a very usable bench by the fire pit - makes perfect sense.  And we've got another little planter area (to which I need to run some drip lines as well).

Monday, May 17, 2010

Cheese Opening!

I finally couldn't wait any longer to open my first cheeses... and it was the perfect opportunity on Sunday.  My homebrew club, the Hetch Hetchy Hop Heads, were having a picnic.  I knew at least Jim would be able to appreciate them and give me some good advice going forward with my cheesemaking.

The blue was a bit strong, but after cleaning it up, it looked good.  Half of this cheese was eaten during the picnic, so I guess it wasn't too bad.  A cracker definitely helped soften the stronger bite of the cheese.  Jim likened it more to a gorgonzola than a blue.

The manchego wasn't quite a manchego.  It was a bit harder - more like a parmesan.  It turned out really salty.  I think I also left it in the brine too long, or it was the second brining that I did to help keep the mold away that really made it salty.  At the picnic only about a quarter of this cheese was eaten, so you can see the blue was more popular.  Erich had a good suggestion - that this cheese would work very well on a ceaser salad (sort of replaces the saltiness of a anchovie, right?).

At least this encourages me to continue and improve my cheesemaking... I made edible cheese after aging for a few months!   The brie fiasco really set me back as far as motivation, but this weekend helped a lot.  That dedicated cheese fridge might be justified afterall.

Thursday, May 13, 2010

Weekly Mountain Bike ride - 5/12/10


On this week's mountain bike ride (every Wed. at 5:30), my coworker, Jason (I know, it gets confusing sometimes), thought to bring his helmet-cam.  So, I thought I'd share some photos.  This was the Waterdog trail in Belmont.  Since it's the closest to work, this is the trail we'll ride the most.  It's getting busy, so we might look to taking the trek up to the trails off Skyline soon.

This week's ride, Simon took us on his usual route - from the top of Carlmont, take some steep switchbacks, ride the crest, then loop back a bit lower.  It's all single track, so that's fun.  The initial climb is a real leg burner though - not the warmup like the fire road off Lyall which I'm more used to.

Speaking of biking, today was Bike to Work Day.  I finally decided to participate... thinking, "it's just a couple miles" and I don't have any meetings today or anything like that... It turns out it's 4.4 miles.  I rode a little harder than I needed to, so I was unexpectedly a bit warmer when I got to work.  At least the helmet hair wasn't an issue.  And, it was actually faster than driving (or at least just as fast).  I think the ride home may be faster too, even though it's uphill.

Dealing with traffic wasn't as bad as I thought it would be - even over the "dreaded interchange".  Actually, the Holly overpass wasn't tough at all if you want to wait for cars and ride in the shoulder.  The toughest part is crossing lanes to get into the left turn lane.  And with a pack on your back that swings wildly, it's not easy to look over your shoulder (note to self, traditional backpacks are better).  Anyway, it's definitely a unique perspective that I will keep in mind next time I design some bike lanes and reconfigured or new roads.

Tuesday, April 27, 2010

Front yard progress and hops

I made some progress with the front yard - finally getting the steps together with some stacked sandstone.  It took some time - mostly making sure I got all the worms out of the fill dirt.  Of course that means that most of the fill was probably worm casings - not exactly class 2 baserock.  Since I sometimes specify cement treated base, I thought this would be an opportunity to see how it could work for my poor backfill material.  I mixed a sack of cement with the soil as I was backfilling.  I think it will actually work out pretty well.  Otherwise, the stone is just drystacked - no mortar bedding or grouting or anything.  This should make it easy to reconfigure if we change our minds down the road.  Next up will be finishing the edging (which we had a different idea for) and planting.

The hops I planted in a nearby pot are starting to take off.  I'm sure the pot is too small for all three (Fuggle, Goldings, and Cascades - in that order the fuggles is the quickest growing bine).  Maybe next year when they are bigger, I will repot in 3 separate pots.  Now I just need to make some cages so the deer don't start nibbling on them, and run some string to the eaves.

Wednesday, March 31, 2010

front yard update

Somehow the little project in the front yard just keeps getting bigger and bigger.  I thought we were on our way to wrapping things up.  It was great to rent a 65# jackhammer and break up the old steps - made quick work of it - broke it up and loaded the 1/2 ton of debris in the truck in an hour... then found the first in a series of 3 clay pipe drains.  The first we found was one that seems to come diagonally from the center of the garage.  This looked clear, so we decided we needed to keep it - we connected it to our new-ish drain system in the front.  The other two lines were filled with dirt, so figured there was no need to connect those!

We decided to put the outfall with the other two we found a couple weeks ago.  Then we kind of covered them up a little with the stone.  We have kind of figured out what we are going to do with this space... so look for more photos in the coming weeks... it will involve more stone, and now also sprinkler work and maybe some lighting.  Oh yeah, and a new tree (isn't this how it all started - just replace the tree?!).

After a weekend's worth of hard work, the perfect way to finish it was a glass of our newly ready Moose Drool clone.  I know, perfect name - I should have made a label with our dog, Moose, drooling!  And I promise there is no actual Moose drool in the beer.

cheese update - end of march

Just a quick cheese update at the end of March, sorry no photos... believe me, you didn't want to see it!  Unfortunately, I had to toss the brie.  There was a little fruit fly infestation.  It's a good thing they only like brie, because that's the only cheese box they got into.  I think they were initially drawn in by the beer, but then found the moist brie.  Darn!!!  As I was tossing them, I decided to cut into one just to see what the consistency was like - it looked just like a brie should.  I think they would have been great.  They might have still been okay, but I just didn't like the thought of the fact that there were some flies in there.  Oh well, next time!  At least I know the schedule for the brie works for me and that I need to create a better/safer aging environment.

Meanwhile, the manchego and blue seem to be doing okay.  No fruit flies in their boxes.  The manchego is still keeping the mold at bay... and at this point, I'm sure the skin has developed enough where I wouldn't be too concerned about some mold anyway.

Monday, March 15, 2010

cheese update again

I finally made some time last night to tend to my cheeses (probably a week overdue):


The manchego is definitely faring better in the fridge - molds are at bay, although from the slight cracking, maybe it's not humid enough.  I added a little salt to make sure no more molds show up, and oiled it again.


I wasn't sure how the scraping was really supposed to be performed for the bleu - was I supposed to kind of smear the mold, or scrape it all off?  I ended up just scraping it off because the top layer of cheese was a little slimey (like you would see on the outside of a store-bought wrapped bleu that's been wrapped for awhile).  It's actually really starting to look like a real bleu!  It compared well to the Point Reyes Bleu we had with dinner last night (which was the original host mold).  This could be really good in a few months.  I re-pierced to make sure there was going to be enough internal mold.


The brie are getting a few other strange colors on them - some red/pink color and a yellow spot.  It doesn't really look like mold, but I don't know what else it could be.  The white mold is obviously dying off, so that probably leaves them a little vulnerable.  I decided to unwrap them and see if the white mold will grow back.  Meanwhile, the one I cut and shoved the two halves back together seems to be knitting back together just fine!


And here is the entire cheese collection at this point:


After playing with the cheeses, we opened some of Megan's wine to have with dinner.  She still didn't want a full glass, but agreed that it was getting much better.  With my less discerning palette, I was fine with a full glass!  I bet it will be even better tonight now that it's had some air.  At about 13 months old, I imagine it's about hitting its peak.  I think we'll try it again in another 3 months or so.  It might be even better then.  If not, I will assume it has hit its peak.  Here it is next to our standby, TJ's Coastal (which Megan had to drink).  You really can't beat this Castoro sourced chard for $4.

Thursday, March 11, 2010

San Carlos budget woes

Yep, our City (San Carlos) is in dire budgetary straights... along with many other Cities, Counties, and States. I thought I’d share a great article by one of our bright council members (seriously, this guy’s got a good head on his shoulders): http://www.smdailyjournal.com/article_preview.php?type=opinions&title=San%20Carlos%20at%20a%20crossroads&id=126547


I could go on for pages about what I think we should do... but the gist of my thoughts are – the City needs to become more flexible to more quickly react to various economic conditions; and we should pay for what we get (i.e. use taxes) – the General Fund just seems so irresponsible. I want to see a nexus between the City’s income and the City’s expenses. That way, the public can be more easily educated, and others are held more responsible for the City’s budget.  Don't get me wrong - I don't think it's all the City's fault - it's the fault of circumstance, history, and the State... and don't get me going on about the State!

Traffic complaints

A coworker passed this comic along to me, thinking I’d appreciate it. I certainly do, as I’m sure anyone involved in the public works field can as well. But I find myself in this same driver’s position many times... or, even worse, the signal fails to even recognize me waiting at the stop line. As I watch the signal go through the second cycle, I wonder if I would get ticketed by running the red light even though it’s safe.


Traffic signals have become much more advanced with video detection, advance detection, interconnect with other signals, fully actuated signals (i.e. they can tell if a car is waiting), emergency vehicle pre-emption, etc. Intelligent Transportation Systems (ITS) could be the new wave, but having seen it at school 15 years ago, I haven’t seen it really become commonplace. Small municipalities are never going to be able to afford this for their entire system.

I see at least three options:

1. Maybe some day in the future, we will all have the ability to control each signal... you’re waiting at a red light and there are no other cars in sight... and you’re waiting... and waiting... push a button in your car and the light turns green. Wouldn’t that be nice? Could we be trusted with that much power?

2. Maybe we’re just better off if there’s a person back at City Hall watching every signal and they can turn it green for us... if the City had the budget. The technology is certainly there.

3. Maybe the laws could change so it’s okay to run a red light. Have you seen how they drive in Mexico or Rome? Red lights don’t seem to mean much there and I don’t recall seeing any accidents during my visits. Apparently it’s been considered for it to be legal for bicyclists to run red lights and stop signs. Here’s one example: http://cbs5.com/local/bike.lights.stop.2.751714.html

Monday, March 8, 2010

front yard project update


Well, it's a long way to go, but at least it's a start... starting to get the structure in place.  The stone "curb" will create a transition from the landscaping to the driveway and the gutter, so the ground cover doesn't spill over too much.  With an extra 12" width to the driveway, it will be easier to fit two cars, and I don't have to park in the landscaping like I had been doing.  I left the DG a little low since I know we will be doing more work and it will get dirty.  The last step will be to add another inch or so of DG that I will park on.

As for the structure, I think we need to take some dirt out, but I also want to add more stone around the drains - sort of like headwalls.  This will also create a little bit of terracing like the neighbor's yard.  That should add some interest to the space... and tie in to some similar styled steps going up the side yard.  Thanks to our friends at Lyngso for the stone and DG - very friendly people and they usually have exactly what you want.

I wanted to get to the cheeses this weekend, but just didn't have the time.  Maybe tonight.  I did, however tune the mountain bikes up and put the new pedals on.  I also pulled out all our gear and ordered new bladders for the camelbaks, new helmets, and batteries for the bike computers.  Once that shipment comes in, we'll be set to ride!

Tuesday, March 2, 2010

Last weekend's house project

The idea was to get this tree out before any birds decide to nest it in.  Plus, this time of year, it should be easy with the soft ground...

Taking this tree out was a little more work than I expected.  I figured I could just dig around and cut roots, but one root I found was probably 9" in diameter!  I did dig around and cut as many roots as I could, making sure that by taking the stump out, I wasn't going to break a pipe of some sort or another.  Sure enough, in my digging, I found two storm drain pipes with outlets buried in mud and ground cover.  It's hard to say where they come from, but it's easy to enough to clean them up and make sure they drain well.

So, after loosening the stump as much as I could, I hooked it up to the FUNTRD, put the truck in 4-lo, locked the rear diff, and gave it a few good pulls... out it came, tearing apart that giant root.  That was fun.

Yes, I know, I should have had a fiber roll along the perimeter and inlet protection at the downstream catch basin... but I was careful not to get too much mud in the gutter.  Plus, the NPDES General Permit doesn't apply to projects of only 10 square feet... yet...

Friday, February 26, 2010

Manchego update

Wow, this manchego got moldy!  Trying to get a good olive oil rind is tough.  It had some moldy spots in the past and I just cleaned them off with brine.  The last time, I thought I would really make sure it didn't get mold on it by salting it and then rubbing olive oil on it.  The problem was that every time I cleaned it, the skin would come off - never establishing the rind and probably losing some cheese in the process.  I thought I could hit it hard with some salt and leave it for a week or so to really build up a rind I could wash off without sacrificing the rind... no such luck.

So, I cleaned it off again.  The rind still came off this time, losing quite a bit of the cheese in the process.  Also, I noticed the cheese has become relatively soft.  Interesting.  Well, this cheese has a long way to go still... so we'll see.  Maybe next time I'll just leave it as it is and if it turns out edible at the end of a few months, great, and therefore maybe I don't need to worry about the mold so much.  If not, I know I need to continually fight the mold.  This time, I'm going to do the salted olive oil rub again, but put it in the garage fridge.  Maybe the wine room is just too warm and the cooler temperature will keep the mold at bay... at least long enough to establish a good olive oil rind.

Monday, February 22, 2010

Saw Wicked

We saw Wicked on Sunday. What a fabulous show - definitely a must-see.  The tie-in's to the movie were fun to discover.  First we met Kurt and his wife, Dee, at the HiDive in San Francisco.  Even though it was pouring rain and Megan and I got drenched during the 7 block walk from the BART station, it was worth it.  The staff at the HiDive are lots of fun, the food was great, and the drinks even better.  We took an "interesting" cab ride to the theater and all thoroughly enjoyed the show.  Apparently cab drivers are quite a competitive group in The City.

The theater show (as opposed to the cab ride show), Wicked, reinforces the idea that there are always multiple perspectives to a story.  Sometimes I need reminding that there could always be an explanation I don't expect - and, as my dear 'ole dad taught me, never assume.  "You know what happens when you assume things..."  Many times I find that it's quite beneficial if I wait to get all the stories, or ask the right questions, to find those other perspectives.

Opened a brie

Partly I got anxious, but I also just wanted to see how the cheese was progressing on the inside. Since I have 3 going, I thought opening one wouldn't be a huge sacrifice... in the name of science. What I found was a normal brie crust as you can tell from the outside. Inside that was a very thin layer of creamy gooey brie. Inside that (majority of the cheese) was a still firm and kind of chalky but creamy (not gooey) cheese. The crust tasted fine. The gooey layer tasted great. The inside didn't taste very good. The first bite wasn't bad, but later bites were less desirable. Megan thought it smelled bad. Since I don't smell good, I couldn't tell. Maybe that was just her excuse to not try it. I'm sure she's scared to... and I don't blame her, I suppose.


At only 4 weeks old, I suppose I didn't expect too much for a cheese that is supposed to age 3 months. At least I confirmed they should get the full 3 months of aging before I open them up. For the one I opened, I took a slice out of the middle, pushed the two ends together, and re-wrapped. We'll see how that fares as well.


Speaking of wrapping. I tried the clear cellophane cheese wraps (supposedly meant for wrapping mold-ripened cheeses). I didn't wrap all the bries with this, I wrapped one with just this wrap, one with this wrap plus wax paper over it, and I kept one wrapped with wax paper. The cellophane ones had a ton of water droplets, whereas the wax paper seems to sort of absorb it and be happy. I thought the water droplets were probably bad, so I re-wrapped everything with just the wax paper.


Photo quality is poor since I used my phone that only wants to take 12k photos.


Monday, February 8, 2010

Weekend cheese updates

I did some work on the cheese this weekend:
wrapped bries and cleaned and oiled the manchego.


Thursday, February 4, 2010

Cheese aging lessons

Now that the cheeses have been around for at least a few weeks, I've learned a few things:

1. Bamboo mats are great for initial draining and drying, but not good for aging - they can harbor unwanted molds and such. I have to get some plastic mats for sure... in the meantime, small tupperware lids work.

2. Aging cheeses is smelly... or at least while the mold is forming. I'm hoping that after I wrap them, the smell won't be so strong - particuarly since they're in the wine room. This process is probably better off in the garage.

3. 9 is colder than 1 on the garage fridge. Ooops. The previous time I checked the bleu, I thought I would warm the fridge up a little - it was close to 40. Instead, I cooled it down closer to 30. I hope I didn't freeze the bleu and kill it. It sort of seemed fine, but I guess we'll see. Meanwhile, I warmed the fridge up - in the correct direction this time. Maybe I should bring it up into the wine room to check and make sure it's still happy.

That's all for now. Definitely fun mold management last night! Hopefully I haven't screwed up all the cheeses.

Thursday, January 28, 2010

cheesy updates

1/28/10 cheese update:


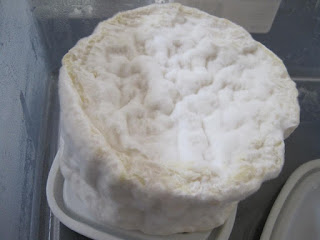
Bleu is getting covered with mold nicely (I think).

Brie is starting to get spots of little white fuzzies.


And here is my manchego style cheese just out of the brine. It has a nice rind starting. I'll rub with oil in a week or maybe a little less - once the rind is drier.